HOW TO ADD MULTIPLE INVERTERS TO A PLANT
Adding multiple inverters into a plant proves highly beneficial for parallel systems. This configuration enables the Power Flow display to illustrate the collective performance of the inverters as a unified system, rather than displaying each inverter’s data individually. However, if necessary, you can still view the individual performance of each inverter.
How to Add Multiple Inverters on a Desktop:
To incorporate additional inverters into a plant, ensure that each inverter has its dedicated Data Logger. Once they are all connected to the Wi-Fi, proceed to create the plant using the Master inverter.
After completing the plant creation process, navigate to your Plant List on Sunsynk.net.
After locating the created plant, click on the three dots found under More.
When you click on the box, you will encounter several options, the availability of which depends on your access level.
For this procedure, it’s important to note that all accounts should include access to the Add Gateway button, which is essential.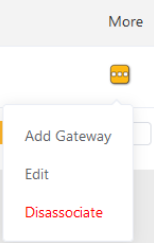
How to Add More Inverters:
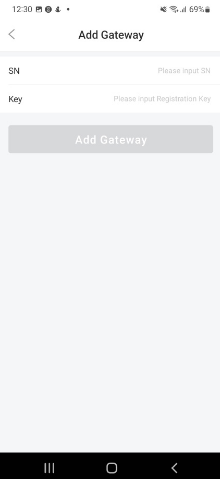
Please select the Add Gateway button as mentioned earlier, and it will prompt a pop-up window.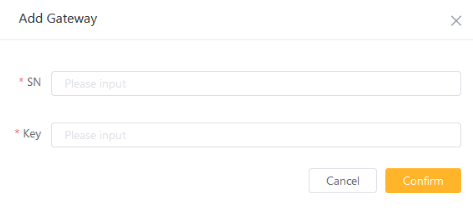
The term ‘Gateway’ in this context refers to the Data Logger, and you can locate the required information on the Data Loggers of the other inverters. Below is an example of what the serial number and key should look like. After entering this information, please click Continue located at the bottom right of the pop-up.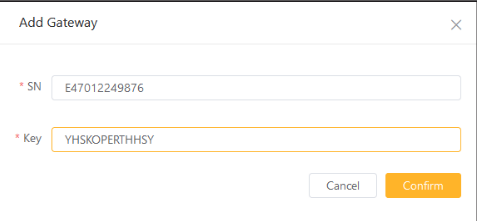
This action will successfully integrate the other inverter into this specific plant. If you wish to verify this, click on the plant name to access the Overview screen, and at the top of the screen, select Equipment.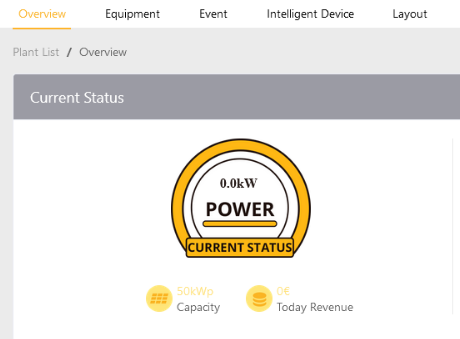
The inverters will then be listed below on the left-hand side.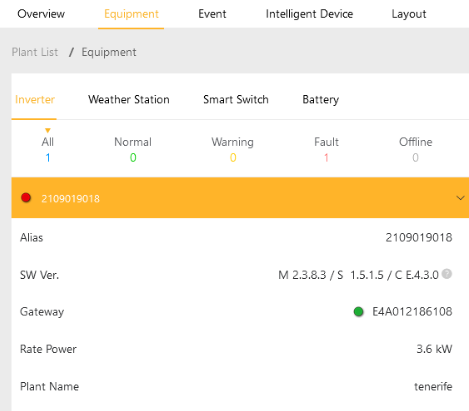
How to Add Multiple Inverters on the Mobile Phone App:
To add multiple inverters using the Mobile App, the process remains the same but with a slightly different interface.
Please ensure that each inverter has its dedicated Data Logger. Once all are connected to the Wi-Fi, proceed to create the plant with the Master inverter. After plant creation, navigate to your Plants option located at the bottom left of the screen.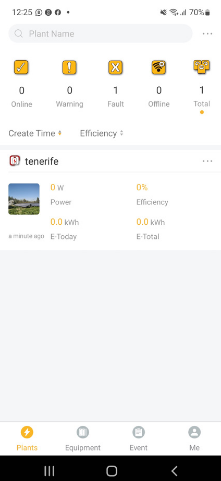
Next, tap on your selected plant to access the overview screen.
Once on the overview screen, please tap the Equipment option located at the bottom of the screen.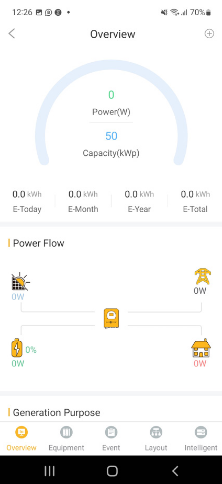
This action will display the following page.
On the top of the screen, you will notice it also mentions Gateway, which you will need to click on.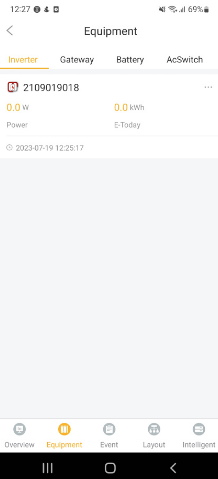
Once you tap on Gateway, you will notice a + sign at the top right of the screen.
It’s important to note that in this context, Gateway refers to the Data Logger, and the necessary information can be located on the Data Loggers of the other inverters.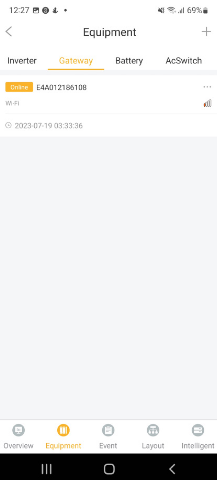
When you tap on the + sign, it will open the camera, enabling you to scan the QR code located on the Data Logger.
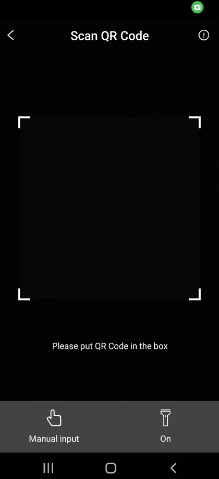
If you are not present at the installation site, you can select Manual Input located at the bottom left of the camera screen to manually enter the serial number and key.
After adding the Gateway, you can ensure it’s correctly setup by checking the Gateway screen, where you’ll find multiple Gateways listed.

Was this article helpful?
That’s Great!
Thank you for your feedback
Sorry! We couldn't be helpful
Thank you for your feedback
Feedback sent
We appreciate your effort and will try to fix the article