How to upgrade the firmware on the Sunsynk Connect portal
First, initiate a search for the specific plant requiring a firmware upgrade. In this instance, we are updating the firmware for the 'Tom & Hannah Home' plant.
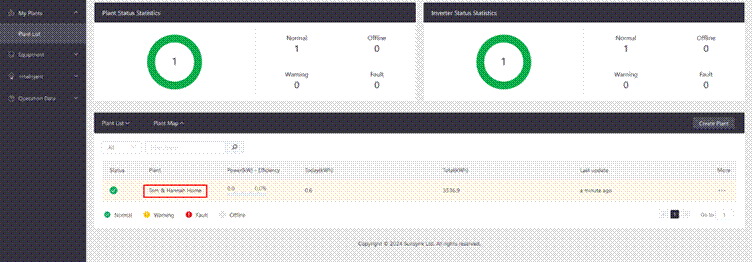
Figure 1: Search the plant.
Choose 'Equipment' located at the top of the screen.
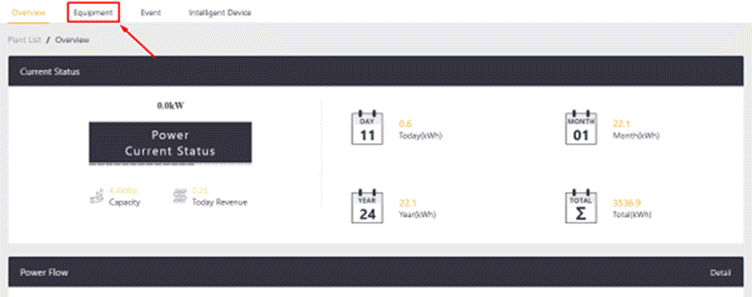
Figure 2: Choose 'Equipment’.
At this page you will see the current firmware versions along with the inverter size. The first firmware relates to the MCU, while the second, highlighted in a red box, refers to the LCD firmware. The third red box indicates the inverter size. On the right-hand side, locate three black dots. Click on these dots to reveal a dropdown menu.
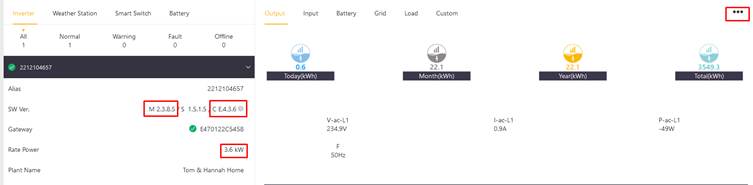
Figure 3: Current firmware version
In the dropdown below, you'll find the option to select a firmware upgrade. Choose 'Upgrade'
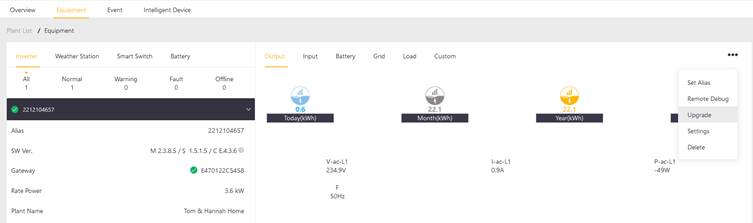
Figure 4: Select Upgrade from drop down menu
After clicking 'Upgrade,' a dialog box will appear, allowing the selection of firmware. Always prioritize upgrading the LCD firmware first, followed by the inverter firmware. The firmware should be upgraded in hexadecimal order, as illustrated below:
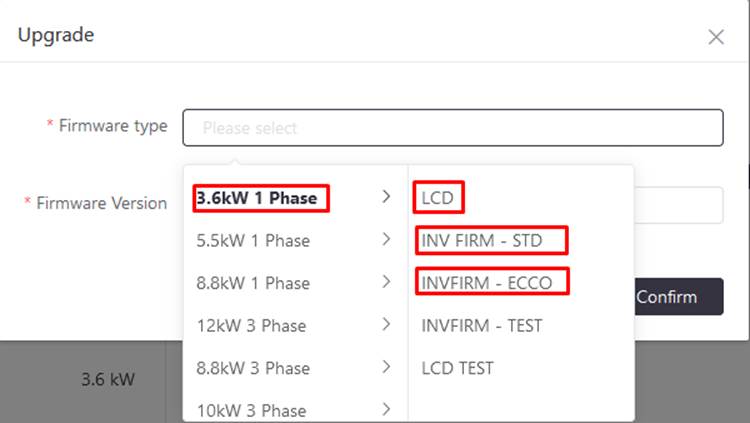
Figure 5: Selecting LCD first
Following that, select the appropriate firmware version, as illustrated in the provided image below.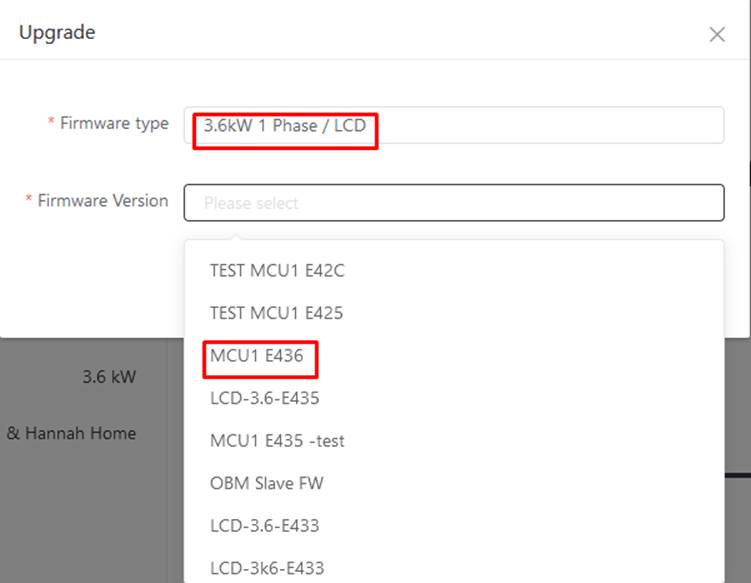
Figure 6: Selecting firmware version
The current firmware is E436. Subsequent versions will follow as:
MCU1 E437
MCU1 E438
MCU1 E439
MCU1 E43A
MCU1 E43B
MCU1 E43C
MCU1 E43D
MCU1 E43E
MCU1 E43F
MCU1 E441
To update the inverter, choose the inverter type, and then select the firmware version, as demonstrated in the figure below: 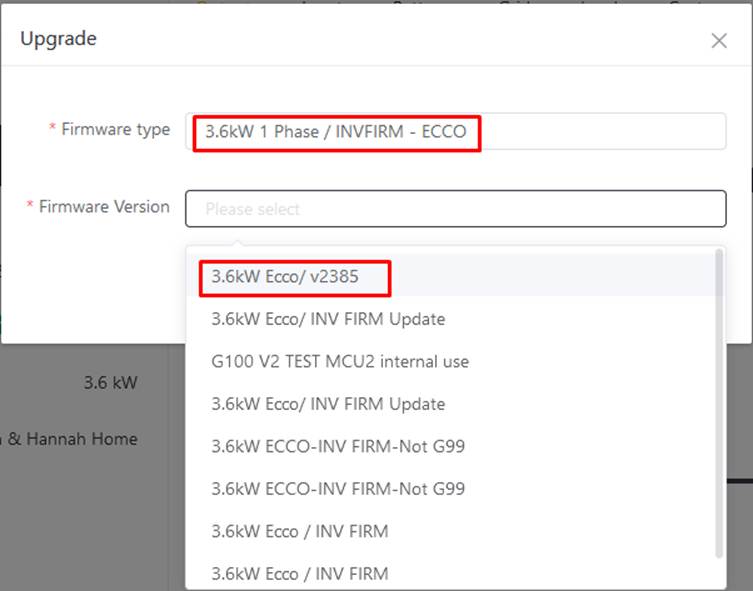
Figure 7: Selecting MCU version
Once you have selected the firmware version, click ‘confirm’ as shown in the figure below,
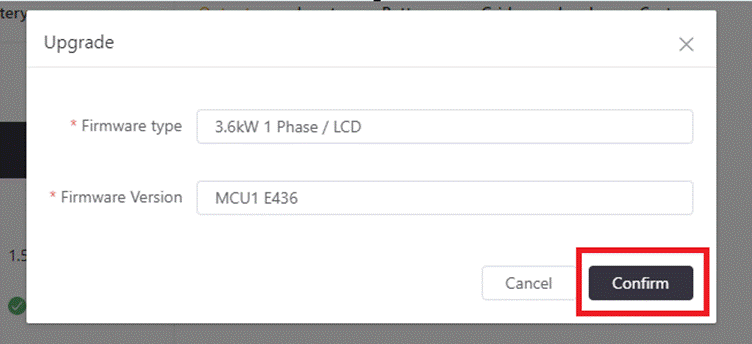
Figure 8: Confirm
To check the progress of update, click of the arrow as shown in the figure 9,

Figure 9: Progress
Following your selections, you can track the update progress.
Was this article helpful?
That’s Great!
Thank you for your feedback
Sorry! We couldn't be helpful
Thank you for your feedback
Feedback sent
We appreciate your effort and will try to fix the article