Table of Contents
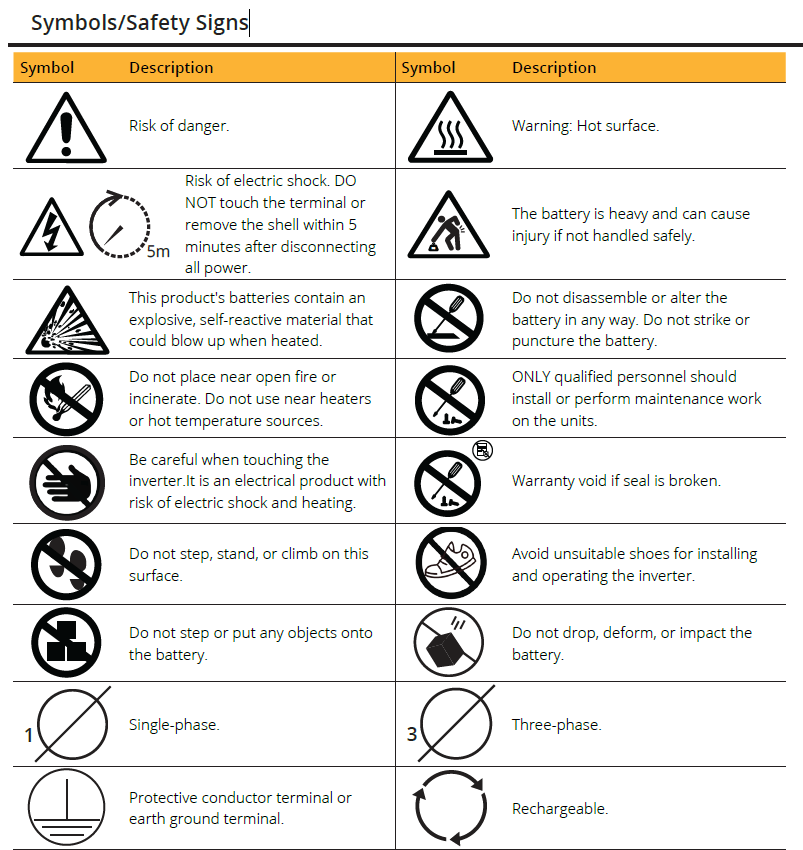
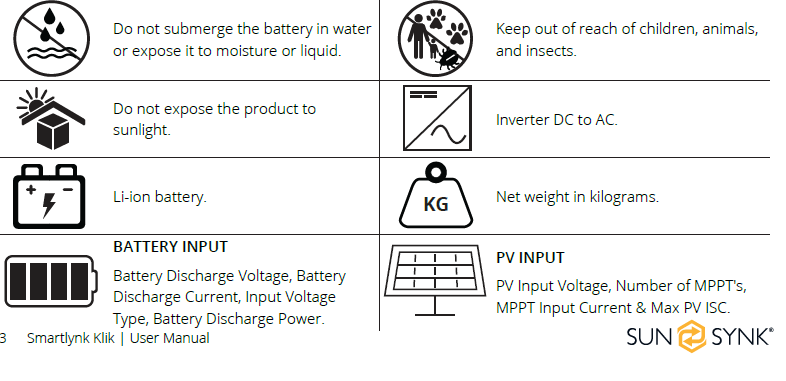
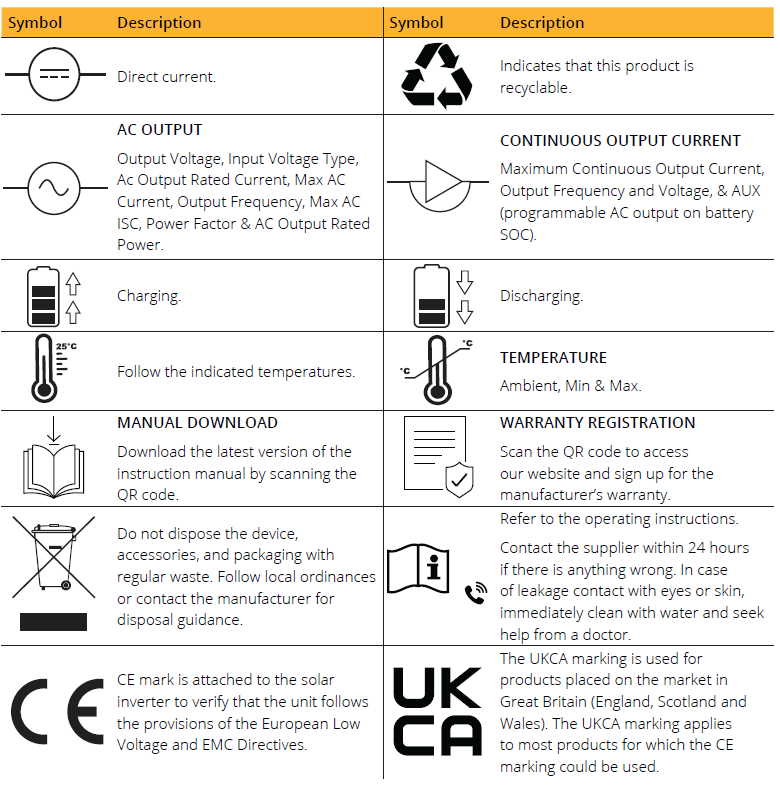
Symbols/Safety Signs
Parts List
Installation Tools
Product Overview
Key Features
Wiring Diagram
Installation Instructions
Protocol Configuration
Setting Battery Capacity
Supported Protocols
Data Sent to the Inverter
Specification
Troubleshooting
Compatibility
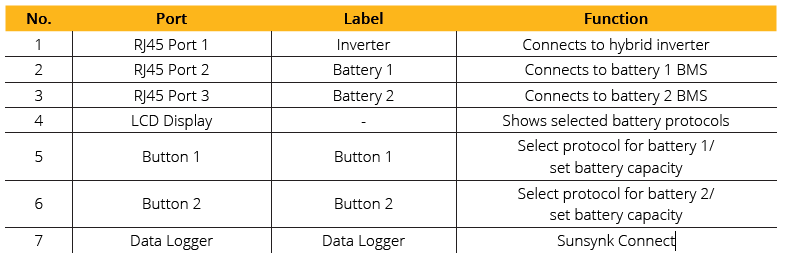
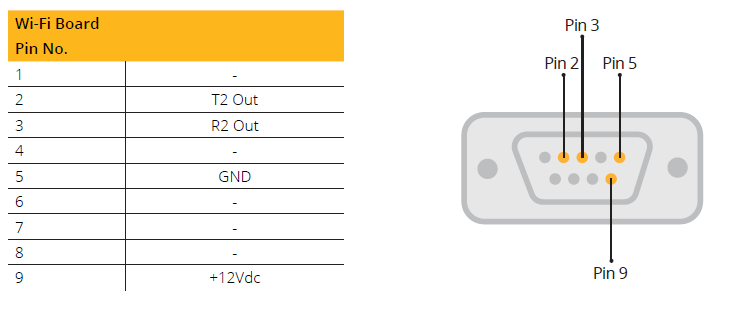
Connections Pin Out
Wi-Fi Board
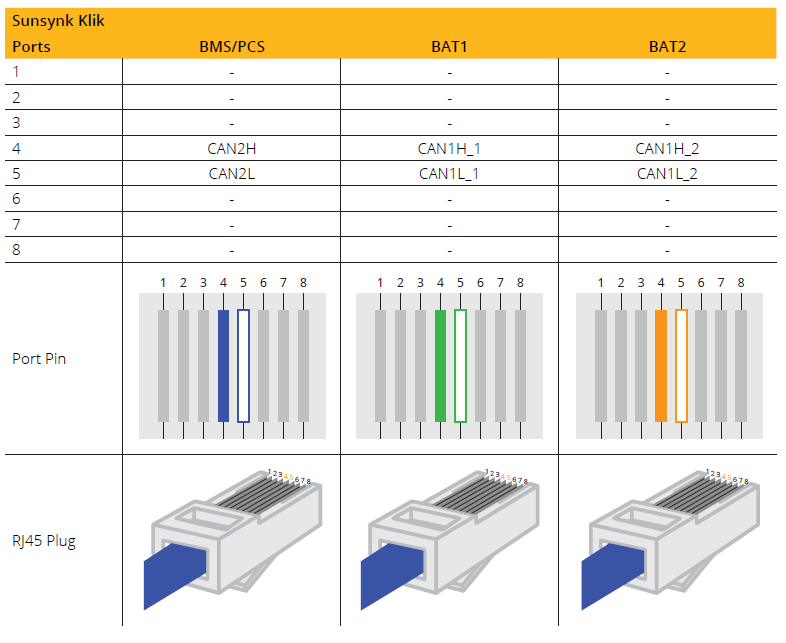
Sunsynk Klik
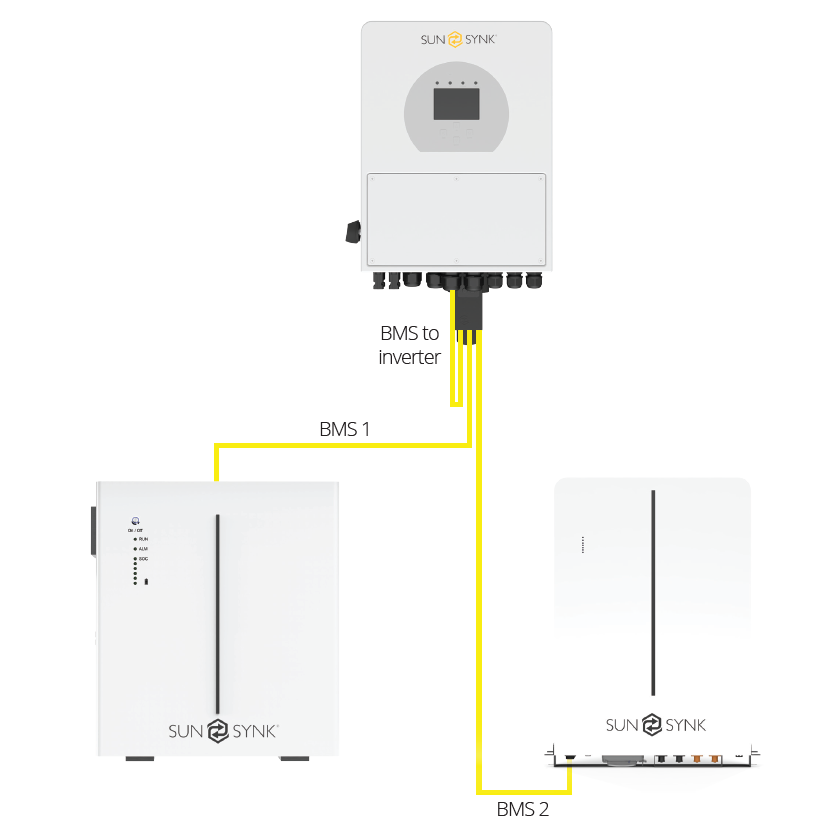
System Overview
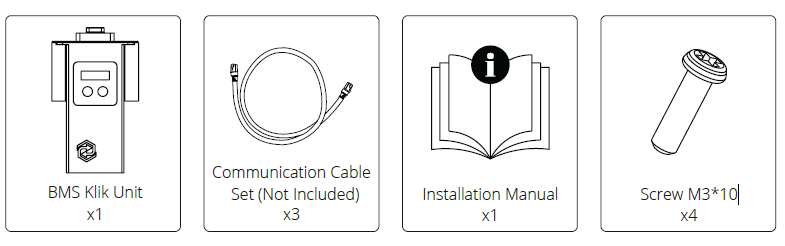
Parts List
Check the equipment before installation, please make sure nothing is damaged in the package.
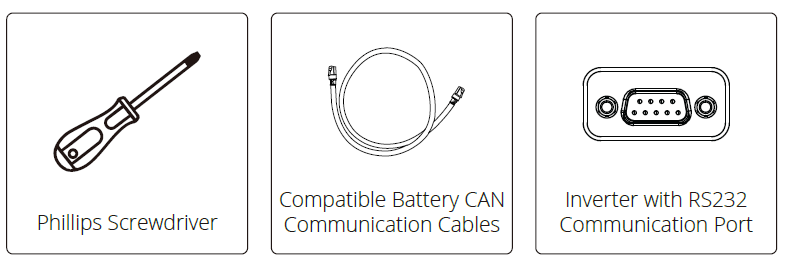
Installation Tools
Installation tools can include the following recommended items. Additionally, utilise any other auxiliary tools
available on-site
Note
Prior to installation, please take a note of the Data Logger serial number prior to installing the Sunsynk Klik
device. The Data Logger serial number will be required for Sunsynk Connect or Sunsynk Connect Pro set up.
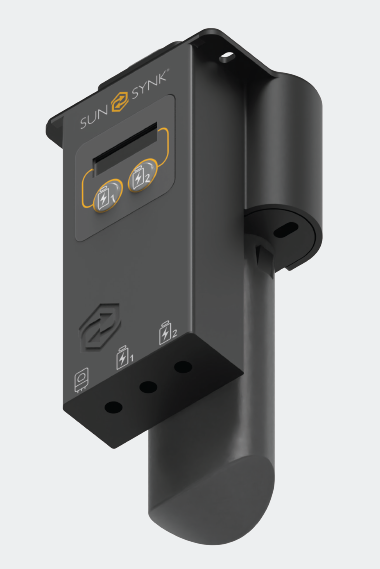
Product Overview
Sunsynk Klik allows you to connect two batteries with different BMS protocols to a single hybrid inverter. It
translates, aggregates, and sends a unified CAN signal to the inverter.
Key Features
Supports two independent batteries.
Aggregates CAN signals to inverter.
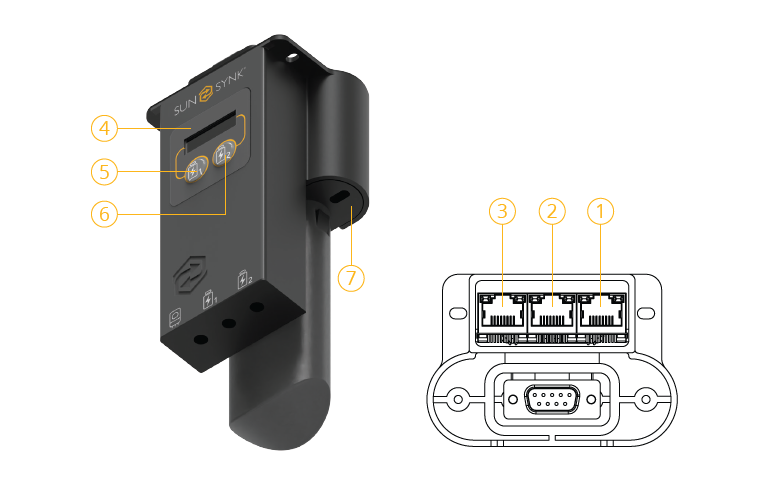
Built-in LCD interface for protocol configuration.
Powered via 12V from inverter RS232 port.
Plug-and-play with 3x RJ45 ports.
Wiring Diagram
Connect the Sunsynk Klik as follows:
Step 1 | Connect the battery communication cable from battery 1 to the Sunsynk Klik battery port 2.

Step 2 | Connect the battery communication cable from battery 2 to the Sunsynk Klik battery port 3.
Step 3 | Connect the BMS/PCS communication cable to the Sunsynk Klik battery port 1.
Installation Instructions
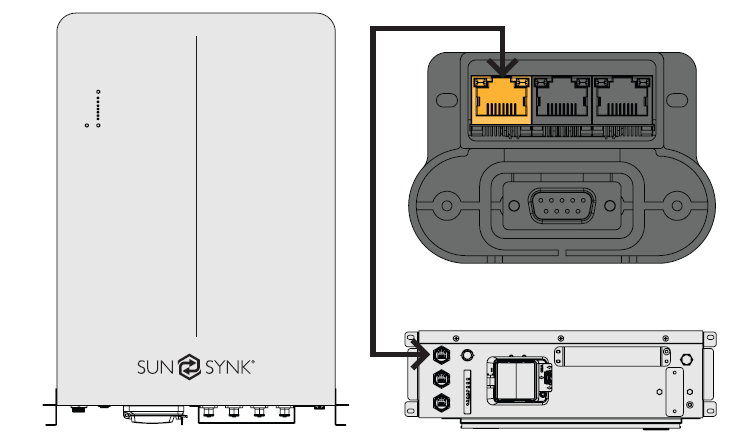
Step 1 | Locate the inverter's RS232 communication port (Wi-Fi port).
Step 2 | Unscrew the inverter Wi-Fi port cover.
Step 3 | Plug the Sunsynk Klik into the Wi-Fi port.
Step 4 | Secure the Sunsynk Klik in place using screws.
Step 5 | Connect batteries communication cables as described in the section above.
Step 6 | Power on the inverter to activate the Sunsynk Klik.
Step 7 | In order to use Sunsynk Connect, the Data Logger must be inserted into the back of the Sunsynk Klik.

Use CAN/PCS ports on the batteries. Use the BMS/PCS port on the inverter.
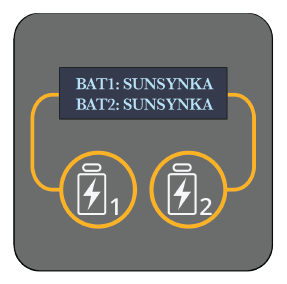
Protocol Configuration
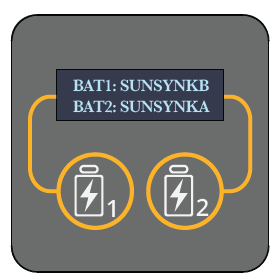
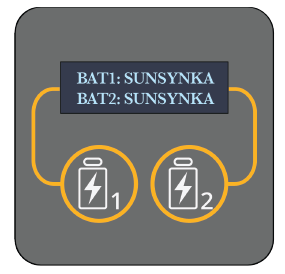
Upon powering up:
Step 1 | LCD will display BAT1 and BAT2 protocols.
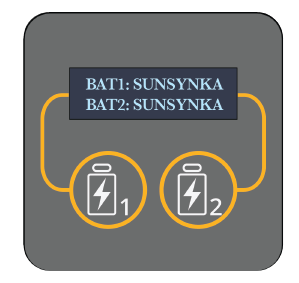
Step 2 | Long press button 1 once to enter protocol selection mode for BAT1 (name flashes).
Step 3 | When BAT1 begins to flash, press button 1 to scroll through compatible protocols.
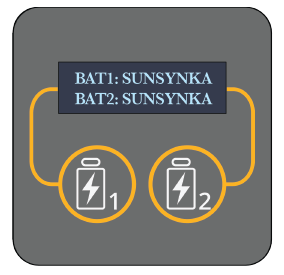
Step 4 | Once you have reached the protocol required, wait 5 seconds without pressing any buttons - setting will auto-save.

Set Battery Capacity
If the Sunsynk Klik does not show the correct combined SOC, it may be due the battery not sharing capacity information. Use this function to manually enter the battery capacity (Ah).
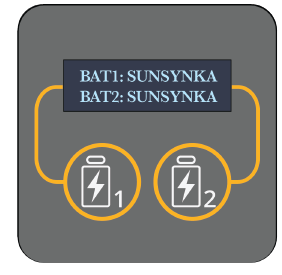
Step 1 | LCD will display BAT1 and BAT2 protocols.
Step 2 | Long press button 1 twice to enter BAT1 capacity.
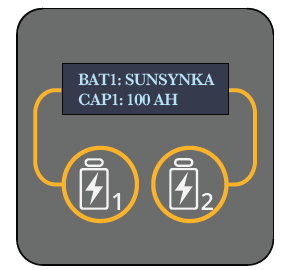
Step 3 | If the display shows 0Ah, it means the battery does not share capacity information. Press buttons 1 or 2 to increase or decrease the capacity.
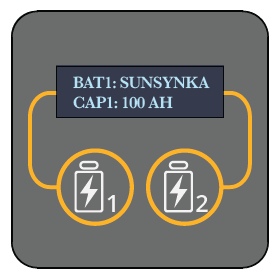
Step 4 | Once you have set the capacity, wait 5 seconds without pressing any buttons - setting will autosave.

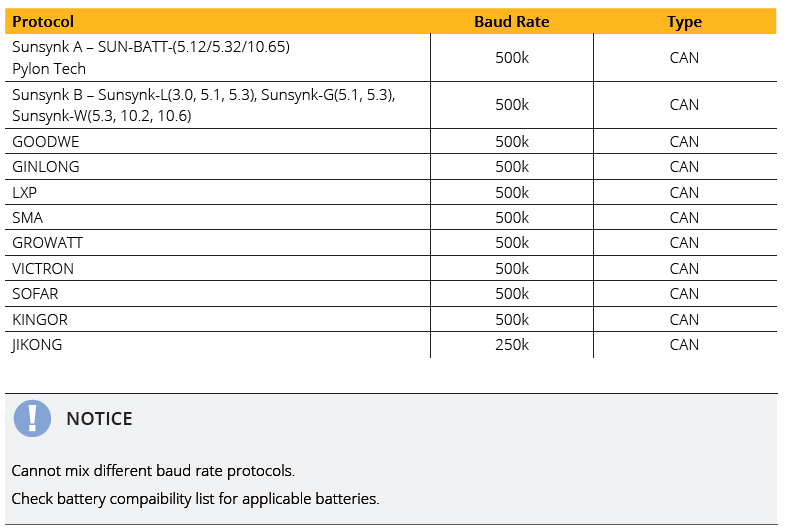
Supported Protocols
Data Sent to the Inverter
Step 1 | Select the settings icon.
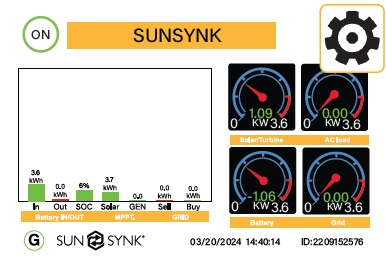
Step 2 | Select Li BMS icon.
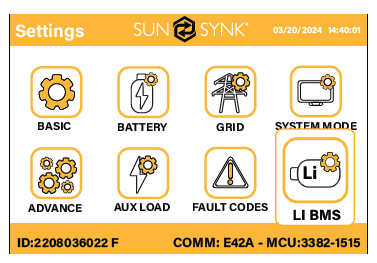
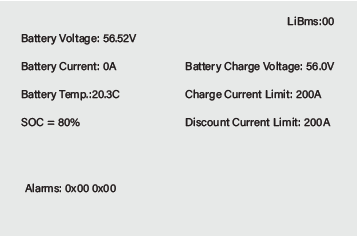
Step 3 | This page shows an aggregate of BAT1 and BAT2 BMS data.

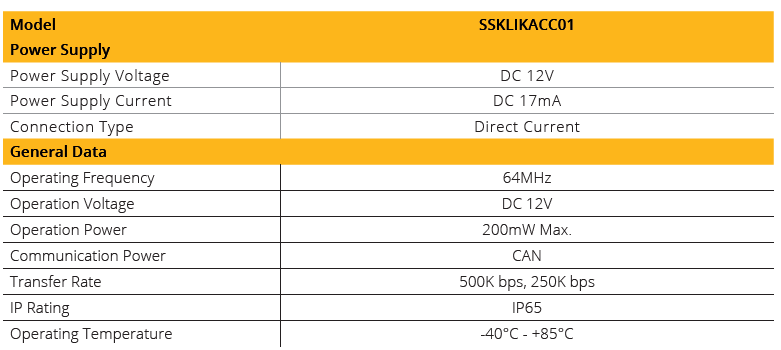
Specification
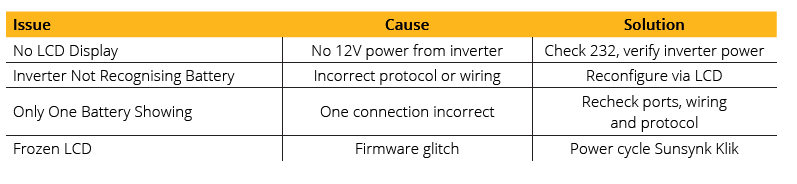
Troubleshooting

Compatibility
This device is compatible with all Sunsynk Inverter models, EXCEPT the following:
Acure Single-Phase (C1, C2)
Acure Three-Phase (C3)
Contour
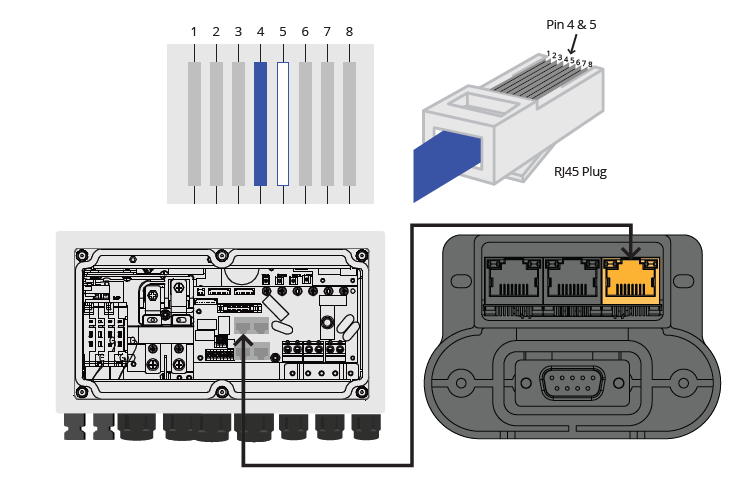
Connections Pin Out
System Overview
Was this article helpful?
That’s Great!
Thank you for your feedback
Sorry! We couldn't be helpful
Thank you for your feedback
Feedback sent
We appreciate your effort and will try to fix the article